Choosing the right Lighting Design begins with more than selecting attractive fixtures. It requires a clear understanding of the project’s users, tasks, architecture, energy goals, and maintenance realities. The International Energy Agency reports that lighting represents approximately 15% of global electricity consumption. This makes every specification decision commercially and environmentally significant.
A successful scheme should balance illuminance, glare control, colour quality, energy use, and visual comfort. A reading desk may need precise, low-glare light, while a hotel lobby may depend on softer layers and carefully controlled shadows. The U.S. Department of Energy’s Energy Savings Forecast of Solid-State Lighting in General Illumination Applications projected substantial energy reductions from LED adoption by 2035. However, efficiency alone cannot define quality. A bright room can still feel uncomfortable. A technically compliant installation may also flatten materials, distort colours, or create harsh reflections on screens.
Start with the people who will use the space. Their age, working patterns, visual tasks, and sensory needs should influence the design. Review daylight conditions at different times, not only during a morning site visit. Consider colour rendering, dimming behaviour, controls, replacement access, and future maintenance costs. Standards from the Illuminating Engineering Society and guidance from the Commission Internationale de l’Éclairage provide useful technical foundations, but no report can replace careful observation. That assumption needs testing. The best Lighting Design is rarely the most dramatic option. It is the one that supports human activity, respects the building, and remains dependable after the photographs are taken.
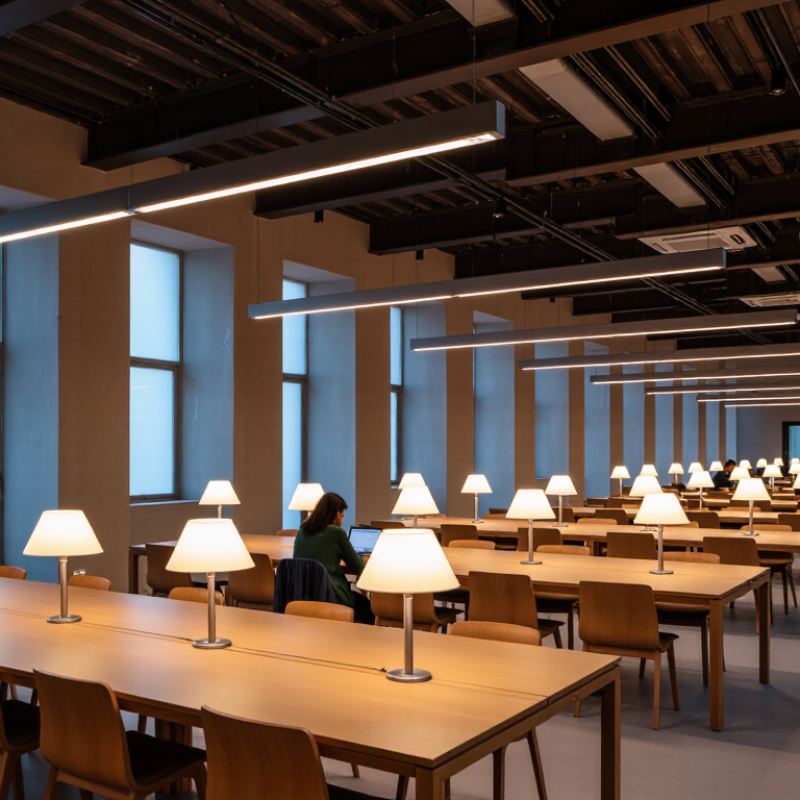
Choosing the right lighting design starts with the project’s purpose. Before comparing fixtures, define what people must see, feel, and accomplish. A reading room needs steady light on pages. A gallery needs controlled illumination that protects delicate surfaces. A workshop requires clear task lighting and safe movement paths.
Identify the users in detail. An older visitor may need brighter, more even illumination. Staff members may need light for cleaning, maintenance, or detailed work. Children and wheelchair users also change circulation and visibility requirements. Record room dimensions, surface colors, ceiling height, and daylight levels. These details often reveal problems that a simple floor plan misses.
Measure lighting needs under real conditions. At a desk, check the working surface, not only the ceiling. In a corridor, watch for shadows near doors, stairs, and corners. Relevant lighting standards can guide target levels, glare control, and emergency requirements. A qualified professional should verify those decisions. On a recent planning exercise, a small mock-up exposed glare on a monitor. The original layout looked efficient, but it was uncomfortable. We changed the fixture position and reduced the problem. It was not perfect. Testing still taught us more than drawings. Choose color quality, beam direction, and controls according to actual activities. A quiet reading area may benefit from warm, dimmable light. A precision workspace may need clearer, higher-quality illumination. When users, tasks, and conditions guide the design, the lighting becomes useful rather than merely attractive.
Before choosing a lighting design, study how the space behaves during the day. Note the room’s orientation, window size, ceiling height, and surface colors. A south-facing room may receive strong, warm sunlight, while a north-facing room often needs steadier artificial light. Observe the space at morning, noon, and late afternoon. Light changes quickly.
Map the layout before selecting fixtures. A reading chair needs focused illumination, while a dining table benefits from balanced, low-glare light. Keep pathways clear and avoid placing bright sources directly behind screens. Pale walls can reflect daylight effectively, but glossy surfaces may create distracting glare. Measure lux levels when possible, especially in work areas. Professional lighting assessments often reveal uneven brightness that casual observation misses.
I once selected a fixture too early. The ceiling looked attractive, but the light left the room’s corners dull. That mistake changed my process. Now, I test temporary lamps and sample color temperatures in the actual space. A warmer source can support relaxation, while a cooler source may improve visual focus. However, color temperature alone cannot solve poor placement. Curtains, blinds, and nearby buildings also affect available daylight. Leave room for adjustment. A design that works on a bright afternoon may feel inadequate on a cloudy morning.
Choosing the right lighting begins with the project’s purpose, not fixture appearance. The International Energy Agency reports that lighting uses roughly 15% of global electricity. Efficient choices matter. The U.S. Department of Energy’s Energy Saver guide states that LEDs use at least 75% less energy than incandescent lamps and can last up to 25 times longer. However, efficiency alone cannot create comfort. A bright corridor may still feel cold, flat, and unwelcoming.
Select lighting types by task and atmosphere. Use ambient lighting for general visibility, task lighting for desks or counters, and accent lighting for artwork or textured walls. Recessed fixtures suit clean ceilings, while adjustable track fixtures provide flexibility. IES guidance supports task-based illuminance instead of brightness alone. Choose 2700–3000K for bedrooms, restaurants, and relaxed seating areas. Consider 3500–4000K for offices, classrooms, and detailed work. Color temperature is not everything. High color rendering, preferably CRI 90 or above for visual merchandise, can make materials look more natural. My early layouts often used too many downlights. The ceiling became busy.
Tips: Draw the furniture plan before placing fixtures. Check glare from seated eye level. Test one sample fixture at night. Dim the room before judging it. Consider controls, daylight, maintenance access, and emergency requirements. A 4000K lamp may look excellent on paper, yet feel harsh beside warm wood. I still revise lighting after mock-ups; drawings rarely reveal every reflection. Use the IEA Lighting report, the DOE Energy Saver guide, and the IES Lighting Handbook to verify performance assumptions.
Choose suitable lighting types, fixtures, and color temperatures based on the visual tasks and recommended illuminance levels for each space.
Typical illuminance targets vary by activity: living areas generally need softer ambient light, while offices, retail spaces, and workshops require higher levels for visual accuracy and safety. Use warm white light around 2700–3000K for residential and hospitality settings, neutral white around 3500–4000K for offices and retail, and cooler light around 4000–5000K for detailed work areas. Combine ambient, task, and accent lighting to improve comfort and flexibility.
How to Choose the Right Lighting Design for Your Project?
Good lighting starts with placement, not fixture selection. Walk through the space at different times of day. Note glare on screens, dark corners, reflective floors, and changing daylight. Place task lighting near work surfaces, then add ambient layers for safe movement. Start at the task. Keep it simple.
Controls should match real behavior. Occupancy sensors suit meeting rooms, storage areas, and restrooms. Daylight dimming works near windows, but commissioning matters. The Lawrence Berkeley National Laboratory reported median lighting-energy savings of 38% across 88 networked-control projects in its field-study review. However, savings decline when sensors are poorly positioned or users override settings. A small wall switch test can reveal more than a polished drawing.
Energy planning should include operating hours, light levels, dimming ranges, and standby loads. The International Energy Agency estimates lighting uses about 15% of global electricity consumption, making efficient operation important beyond lamp efficacy alone. Choose durable components with accessible drivers and documented replacement procedures. Leave clear access above ceilings. Record control zones and settings for future technicians. Maintenance teams often inherit incomplete plans. I have seen this mistake. A design may look excellent on opening day, yet become inconvenient within months. Review cleaning schedules, spare components, and sensor calibration before approval.
How to Choose the Right Lighting Design for Your Project?
A successful lighting plan should be reviewed for comfort before appearance. I examine glare, shadow direction, and reflected brightness on work surfaces. For offices, classrooms, or kitchens, task areas may need roughly 300 to 500 lux, depending on the activity and local guidance. Warm or neutral color temperatures can support relaxation, while cooler light may help visual focus. The choice must fit the room, not follow a trend.
Safety deserves practical testing. I check walking routes, stairs, doorways, and changes in floor level under normal and reduced lighting. Emergency lighting, wiring, mounting heights, and controls should meet applicable building and electrical requirements. A qualified professional should verify these details. During site visits, I also inspect flicker and glare from glossy floors or screens. Small problems become obvious after several hours.
Budget review should include installation, energy use, replacement access, and maintenance time. Efficient fixtures may cost more initially, but lower operating costs can improve the long-term value. Still, efficiency alone does not guarantee visual quality. A room can feel cold, uneven, or strangely flat. Mock-ups help. I prefer testing one real area before approving the full layout. My early designs were sometimes too bright, and I underestimated how tiring reflected light could feel. That mistake changed my review process. Measure, observe, and question the first impression.
| Lighting Design Approach | Suitable Project Areas | Typical Illuminance Target | Recommended Color Temperature | Color Quality | Glare and Visual Comfort | Safety Considerations | Control Strategy | Relative Budget Impact | Visual Quality |
|---|---|---|---|---|---|---|---|---|---|
| Uniform Ambient Lighting | Open offices, classrooms, corridors, multipurpose rooms | 300–500 lux on the working plane | 3500–4000 K for a neutral appearance | CRI 80 or higher for general applications | Use diffused luminaires and control uncomfortable brightness; office designs commonly target UGR below 19 where applicable | Maintain clear circulation routes and avoid dark transitions at stairs, doors, and changes in floor level | Occupancy sensors, daylight dimming, and separate switching zones | Medium | Clean and consistent, but may appear flat without accent lighting |
| Task-Oriented Lighting | Workstations, reading areas, laboratories, kitchens, workshops | 500–750 lux for detailed visual tasks; verify the applicable task standard | 3500–4500 K, selected according to task and user preference | CRI 80+; CRI 90+ is preferable where accurate color recognition is important | Position light to reduce shadows and reflections; use shielding or adjustable optics near screens | Provide adequate light at tools, work surfaces, and controls without creating trip hazards or exposed glare sources | Individual dimming, local task lights, and preset scenes | Medium | Highly functional and efficient when the task layout is known |
| Layered Ambient, Task, and Accent Lighting | Hospitality spaces, residential interiors, reception areas, restaurants, premium retail interiors | 100–300 lux ambient light, with higher levels on focal or task surfaces | 2700–3500 K for a warm to neutral atmosphere | CRI 90+ is recommended for finishes, food, artwork, and merchandise | Use several low-intensity sources rather than one bright source; conceal or shield accent luminaires where possible | Ensure decorative lighting does not reduce visibility on stairs, ramps, paths, or emergency routes | Dimming, scene controls, time scheduling, and separate ambient/accent circuits | High | Strong depth, hierarchy, atmosphere, and flexibility |
| Daylight-Integrated Lighting | Perimeter offices, classrooms, atriums, studios, public areas with windows or skylights | 300–500 lux electric-light contribution, adjusted according to available daylight | 3500–5000 K; coordinate the electric light with the daylight appearance | CRI 80+; CRI 90+ for color-sensitive spaces | Control direct sun, reflections, and high luminance near windows with shading and appropriate luminaire placement | Prevent strong contrast between window zones and interior circulation areas; maintain required illumination during overcast conditions | Daylight sensors, continuous dimming, automated shades, and zoning by daylight availability | Medium to High | Natural and visually dynamic when glare is properly managed |
| Decorative and Feature Lighting | Feature walls, artwork, signage, architectural details, hospitality and public interiors | 100–500 lux on feature surfaces, depending on material and viewing distance | 2700–3500 K for emphasis and visual warmth | CRI 90+ for artwork, finishes, food, and color-critical displays | Use narrow beams, wall washers, and precise aiming; avoid direct view of bright LED sources | Keep feature lighting supplementary; do not rely on it as the only source for stairs, exits, or circulation paths | Scene-based dimming, timed operation, and independent accent circuits | Medium to High | High visual impact and strong architectural identity |
| Outdoor and Landscape Lighting | Entrances, paths, parking areas, courtyards, façades, and landscaped spaces | 5–50 lux for many pedestrian and architectural applications; local regulations determine final values | 2700–4000 K to balance visibility, atmosphere, and environmental considerations | CRI 70–80+ for general outdoor areas; higher where landscape or material color matters | Use full cut-off or shielded fixtures to limit glare, spill light, and unwanted brightness to nearby properties | Select suitable ingress protection for exposure conditions; outdoor equipment often requires IP-rated enclosures and impact resistance | Photocells, astronomical timers, occupancy controls, and late-night reduction schedules | Medium to High | Effective when hierarchy, contrast, and nighttime context are carefully controlled |
| Emergency and Egress Lighting | Exit routes, stairs, corridors, assembly areas, and spaces requiring life-safety illumination | Commonly at least 1 lux along the centerline of escape routes; verify local code requirements | Typically neutral white for clear recognition and visibility | Prioritize reliable visibility and sign legibility over decorative color rendering | Maintain even distribution and avoid glare that could obscure exit signs, stairs, or changes in level | Provide automatic operation during normal power failure, tested batteries or central supply, visible exit signs, and compliant spacing | Automatic transfer, self-testing units, backup power, and scheduled inspections | Required Investment | Primarily functional; should be integrated discreetly with the architectural design |
| Low-Energy Adaptive Lighting | Warehouses, storage rooms, service areas, parking facilities, and intermittently occupied spaces | 100–200 lux for many storage and service tasks; higher levels may be needed for detailed work | 3500–5000 K for visibility and object recognition | CRI 80+ for general identification and maintenance tasks | Use wide, uniform distribution and avoid rapid changes in light level that can impair adaptation | Account for mounting height, moving equipment, wet or dusty conditions, and required impact or ingress protection | Occupancy or vacancy sensors, high-low dimming, daylight response, and operating-hour schedules | Low to Medium | Practical and efficient, with limited decorative emphasis |
Define the space’s purpose, users, and visual tasks. A reading room needs steady page light. A workshop needs clear work surfaces and safe paths.
Consider older visitors, staff, children, and wheelchair users. Their visibility and movement needs may differ. Record these differences early.
Measure room dimensions, ceiling height, surface colors, windows, and daylight levels. A pale wall reflects light. A glossy floor may create glare.
Observe the space in the morning, at noon, and late afternoon. Conditions change. Cloudy weather may expose weaknesses hidden on sunny days.
Place task lighting near desks, tables, and work surfaces. Add ambient light for movement. Keep bright sources away from screens when possible.
Temporary lamps can reveal dark corners, glare, and poor color choices. A drawing may look efficient but feel uncomfortable in use.
Occupancy sensors suit meeting rooms, storage areas, and restrooms. Daylight dimming works near windows. Poor positioning can reduce its value.
Review operating hours, light levels, dimming ranges, and standby loads. Efficient operation matters, not only efficient lamps.
Provide access to drivers, sensors, and ceiling equipment. Record control zones and settings. Keep replacement procedures clear for future technicians.
Do not choose fixtures too early. A beautiful ceiling fixture may leave corners dull. Test the actual space, then adjust.
Choosing the right Lighting Design begins with a clear understanding of the project’s purpose, the people who will use the space, and the activities that will take place there. Consider whether the environment requires focused task lighting, comfortable ambient illumination, decorative accents, or a flexible combination. Analyze the room’s size, layout, surfaces, ceiling height, and sources of natural light to determine where additional illumination is needed and how glare or unwanted shadows can be reduced.
Next, select appropriate lighting types, fixtures, and color temperatures to support both function and atmosphere. Plan the position and direction of each light carefully, while including practical controls, energy-efficient operation, and easy maintenance. A successful design should also be reviewed for visual comfort, safety, installation and operating costs, and overall appearance. By balancing technical performance with human needs and budget considerations, the final Lighting Design can create a space that is efficient, welcoming, adaptable, and visually consistent.

Xiaosan Light